Easy DIY Wood Tile Modern Address Sign for Beginners
A few years ago, we gave our front porch a budget-friendly makeover. Part of that makeover was a new address sign.
Before, the numbers were just nailed to the brick beside the door. They were old and outdated and beginning to rust. It was time for a change!
This post contains affiliate links for your shopping convenience. See my disclosure policy here.
DIY Modern Address Sign
I had originally planned on staining a piece of wood, attaching some more modern looking numbers, and framing it out to make the address sign.
For the most part, that’s still what happened, but when we got to Home Depot, I saw a piece of wood-look tile and decided to go with that instead of a stained piece of wood for something different.
This project is great for a beginner. You just need the right tools and a few supplies!
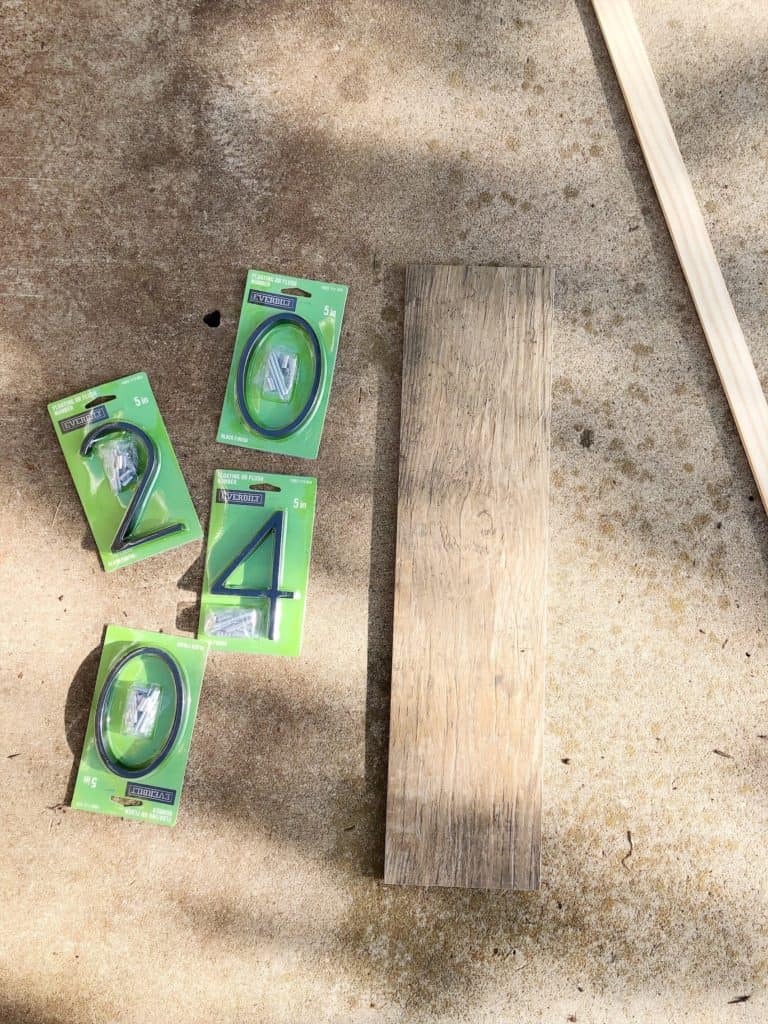
Supplies:
piece of wood-look tile
address numbers
wood for framing out the sign (we used 2″x1/4″)
black paint
hot glue gun
diamond drill bit
power drill
Choose Your Wood-Look Tile
Pick out your piece of tile according to your tastes. I chose this one because we plan on wrapping our current porch posts with wood in the future and this tile was the color we were planning on staining the wood. Now it will match!
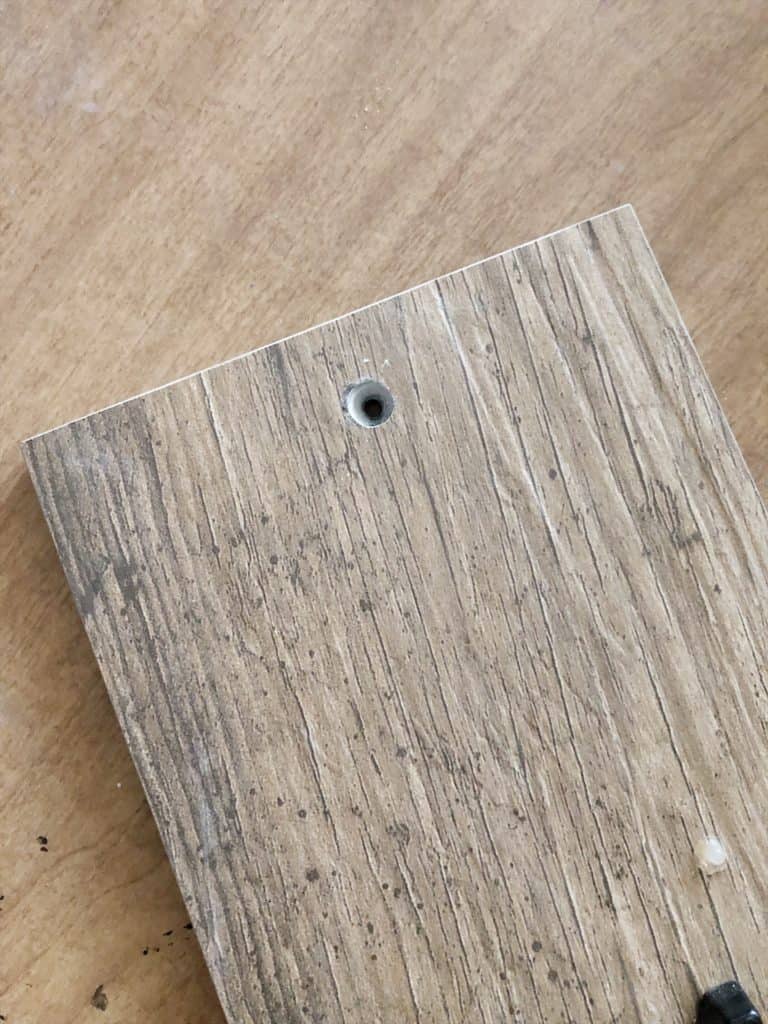
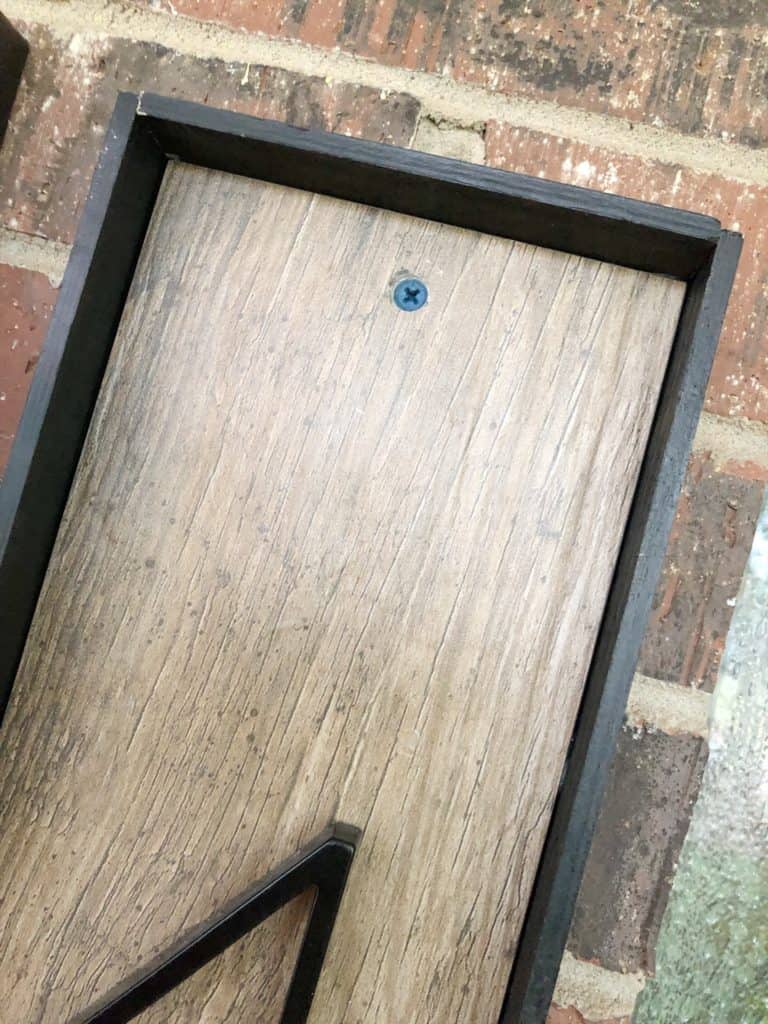
Drill the Hole for Installation
Lay out your numbers on the tile, measuring them out to make sure they’re evenly spaced.
At this point, we removed the first number, marking where it would attach at the top and this is where we drilled the hole to attach to the brick.
We did this so that when we attached the number, it would cover the hole so you can’t see it.
We had to purchase a special bit for Eric’s power drill so he could drill through the tile. It was kind of a beast to drill through, but we made it with the tile intact!
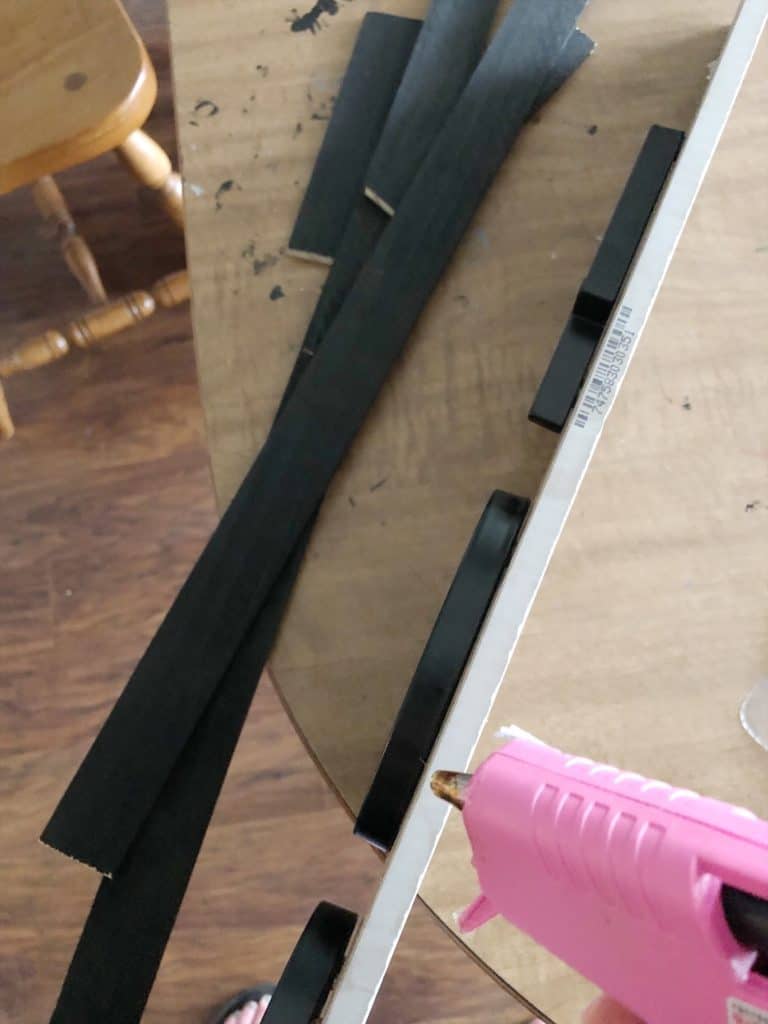
Cut, Paint, and Attach Trim
Measure the sides of your tile and cut the wood accordingly for the frame. Remember that either the horizontal or vertical pieces need to overlap a quarter of an inch on either end so that the frame meets in a rectangle on all sides.
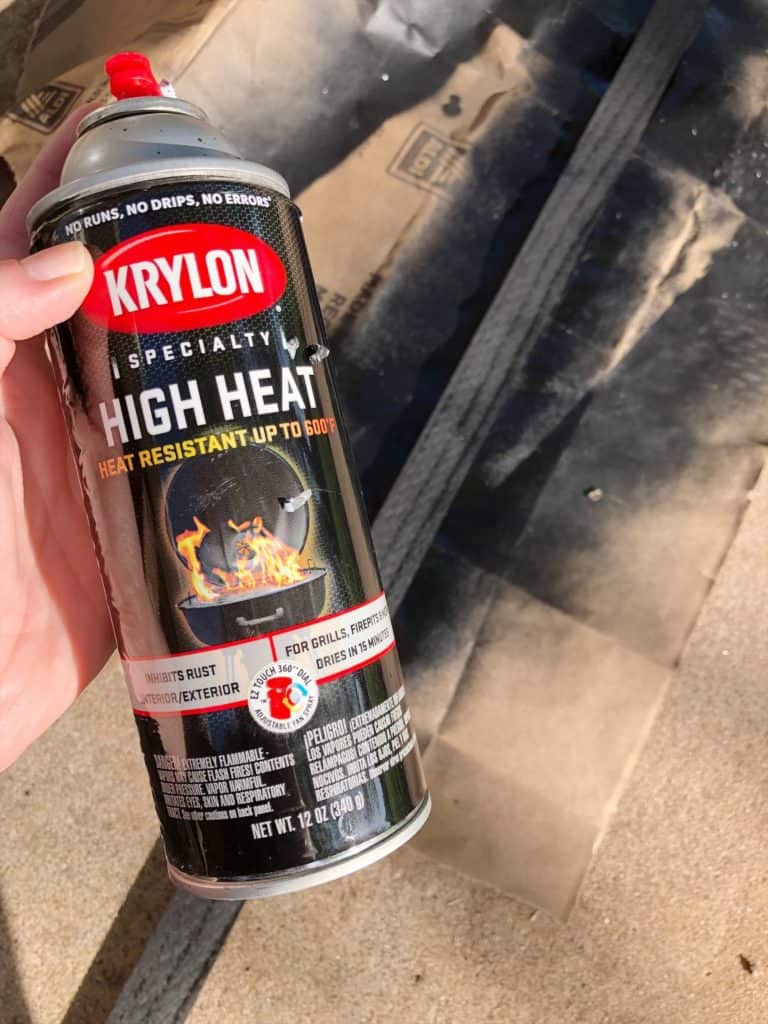
Paint both sides of the trim, allowing them to completely dry in between coats. I had some leftover black spray paint so I used that, but you can use anything.
When all the trim pieces are dry, you are ready to attach them to the tile. I used my hot glue gun to run a line of glue down the side of the tile and then pressed trim in place, making sure it lined up evenly with the back of the tile. Repeat on all sides until all of the frame is glued in place.
Attach the Address Numbers
Once you’ve finished the framing, you’re ready for the numbers! I used my hot glue gun to glue the last three numbers in our address to the tile.
I filled the holes where the screws would normally have gone with glue and then held it against the tile for a few seconds until dry. I love how fast hot glue dries!
*We left the first number off so we could attach the address sign to the brick first.
Installing the Address Sign
Eric drilled a pilot hole in the brick and we lined the hole in the tile up to match. Then he screwed the sign into place.
Once it was in place, I used my hot glue gun one last time to glue the first number in place over the drilled hole.
And that’s it!

I love how it turned out! And it gave our front porch that modern farmhouse vibe I was going for!
For more fun house number ideas, check out this article from Better Homes and Gardens!
Pin for Later:

I love this! Such a great idea. I may just have to update my house numbers now!
Thanks so much Cate!!